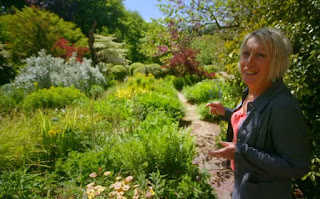
When Carol is not writing about gardening or presenting, she is in the garden.
Whatever sort or size of garden you have or even if you just have a patio or window box she is going to show us how, from the basics to more advanced techniques.
She wants to share the excitement and satisfaction of creating a garden whether you’re a novice or experienced, she wants to share the skills.
Carol is ‘ready are you’?

In this second episode Carol tells us how her and her husband Neil moved to Glebe Cottage in Devon over 40 years ago and creating her garden was her priority.
Today the garden has all her favourite plants packed in and there no place she rather be.
When you start gardening it can be daunting but Carol going to show us from the beginning how you can grow all your own plants and use the one you have to make more.
It can be fun as well as saving you money.
Today the garden has all her favourite plants packed in and there no place she rather be.
When you start gardening it can be daunting but Carol going to show us from the beginning how you can grow all your own plants and use the one you have to make more.
It can be fun as well as saving you money.

Every Spring it has been planted it has beautiful flowers and this reminds Carol of her Mum and what incredible things you can grow from seed.
It is also an enjoyable process creating new life and the most fool proof way is to start the seeds off in trays or pots.
Carol likes to use a half tray so she doesn’t sow too many seeds and that they are sown with room to germinate.

The first seeds she is sowing are a salad crop, some fast germinating Rocket Seeds which have very fine seeds.
She takes a pinch of seed which probably contains about a 100 plants and sprinkles them a couple of inches above the soil starting around the edge of the seed tray first.

The rest of the seeds she puts back in the packet for another sowing and if you do this over the seed tray any you spill will not go to waste.
Most people would then cover their seeds in compost but Carol likes to use grit as it allows the light to get through, it also helps keep the soil moist and the seedlings from rotting.

Some seeds and seedlings grow better with more room than others and with bigger seeds its best to sow them in individual modules rather than a seed tray.
Seeds like Sweet Peas need to be sown singly and pushed down the right way up into the compost about half a centimetre and then the compost squeezed back over the seed.
Her module seed trays are really old but you cold make your own by adding cardboard to a seed tray to separate the modules.

Each big seed in the modular tray will have its own root systems.
Climbing Beans have even bigger seeds and like to be in their own pots and will grow really quickly after being planted the depth of the seed size.
Carol loves growing plants from seed as you can produce a lot of plants although every time is an ‘act of faith’ waiting for nature to turn them into living plants.
You of course have to give the seeds a helping hand as they are dependent on you for water which they need as soon as you sow them to start the germination process.

The bigger seeds like the beans she waters with a watering can and she know they are saturated when the grit changes colour she will then remove the small seeds from the water tray to drain.
When the seedlings come up never let them dry out and water frequently and protect them from the elements.

Depending on the weather and where you have put them to germinate they should be starting to grow in a few days and the wonderful process begins.
Once the seedlings have outgrown their trays they are ready for the next stage.
Carol says ‘Glebe Cottage in Devon is my little slice of heaven’.
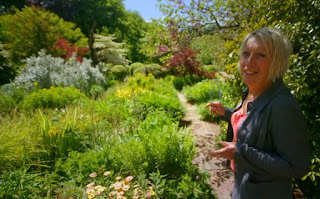
Her garden is divided into different areas and amongst the many colourful borders there is a Brick Garden which is for Ornamental plants and there are parts for her vegetables with the greenhouse.

Every day when she comes out into the garden there are things to do and today her greenhouse is full of seedlings that need ‘pricking out’.
This stage in the plants development is very important as they have now got big enough to move on as the strong little plants are too crowded to get any bigger.
The Seedlings first grow the seed leaves then the true leaves come out the middle and that is when they are ready to be pricked out.
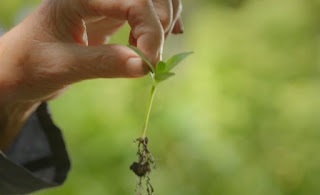
You can see the fine fibrous roots that it has already formed and these and the stem should not be used to transplant the seedling just the seed leaves avoiding the true leaves.
Carol is transplanting them into Modules so they can grow and there is no root disturbance when transplanting them.

They are then kept well watered as the module is quite small and they will then continue growing in the greenhouse or a warm windowsill.
In a few weeks they will be big enough to pot on again into bi pots or straight outside after hardening them off.
Carol loves to fill the garden with flowers to be a ‘feast for the eyes’.

The first crop Carol ever sowed was Peas and they are still one of her favourites.
When gardening it is best to avoid standing on the soil as it destroys the Micro organisms so if you have a scaffold board you can walk on that.
Carol is walking the plank and is making a trench with her mum’s Woolworths spade that probably 60-70 years old.

When planting seeds directly in the soil she likes to tip them into a bowl making it easier to get to them than in the packet.
They need to be spaced a couple of inches apart and to be able to eat them fresh is the best thing and to keep them coming you can sow them in succession a few weeks apart.
After covering the seed they will get a good water and when the little shoots come up you then need to add some twigs for peas sticks or canes and string whatever you have got they can climb up.

A liquid seaweed feed will also help produce a good harvest which will be in about 3 months.

They don’t even need a dedicated area and can be grown amongst your flowers to make not only a beautiful but productive bed.
Whatever size garden you have it is important to maximise the growing space so when Carol is planting her Beetroot she is going to plant something else in between.
Whatever size garden you have it is important to maximise the growing space so when Carol is planting her Beetroot she is going to plant something else in between.

She has grown it in Modules so it is easy to press down amongst the Beetroot and it has a bright yellow root.

Carol thinks the feathery leaves of the Nigella against the dark Beetroot leaves will look lovely and she gives everything a good watering.

Carrot flies go on the top of your carrots to lay their eggs and when the larvae hatch they burrow into the carrot and you do not know until you dig them up to eat them that they are ruined.
Luckily Carrot Fly only can make it to 18 inches off the ground so by sowing Carrots in deep pots that can be raised up it should keep them away as well as get nice long carrots.in the deep pots with fine soil.

It is best to sow Carrots finely and Carol sows just 20 seeds in her pot and gives them a good soaking before putting them in a sunny spot and they will be ready in about 3 months.
Growing from seed is just one option there are other affordable ways to get more plants that are just as enjoyable as watching your seedlings grow.

Lots of the plants in the Brick Garden come from division which means literally dividing one plant into pieces and replanting them.
It is very easy to do and is very productive as well as being fun.

From this one large plant she is going to make several small ones and when it is not flowering is a good time.
It has lovely strong roots so it is well established and would need loosening if going in the garden whole.
When dividing a plant it doesn’t matter if you cut through a strong root as the plant will the grow more tiny ones.

When dividing a plant it needs to be watered well before so the roots do not dry out.
The plant once divided needs potting up quickly in a sterile compost and then take off a couple of the bottom leaves.
The root is longer than the pot and you should not fold the roots as they want to grow downwards so you just need to trim them to the length of your palm (about 4 inches).

From the one Shasta plant she has got six new plants and will keep them in a sheltered spot until big enough to plant out in the garden in a few weeks.
For early flowering plants its best to divide them in Autumn and in Spring for late flowering ones.
Division is not only a great way to get free plants but it also rejuvenates the original plant.
Cuttings

Carol when walking round her garden is not just admiring her plants but also looking to see what would make a good cutting!
She has spotted a Penstemon that has the potential for some cuttings and these come in a range of colours from deep clarets to bright blues.
Her one is a lovely white and the best time to take cuttings is in the morning.
There are two types of cuttings, you can take the older growth which is from the previous year or fresh new shoots.
Carol is going to show us both ways.

For new growth she is using a knife to take the cutting and from the centre of the plant she finds several young shoots that’s she can chop off.
From this one plant you can get up to 30 cuttings without noticing any difference to the plant.
Carol says ‘It’s such an exhilarating process once bitten by the bug it’s really hard to stop’.

Carol loves clay pots as they are porous and excess water drains out the cuttings breathe more and make roots more easily.
Carol is using a multi purpose compost and starting with the new growth as it is so tender and using a sharp knife rather than secateurs she is cutting right under a leaf node which is the point that a leaf joins the stem.
She then strips off the bottom leaves because you want a lot of the cutting to go under the soil.

Carol using her trusty chopstick to make holes and place her cuttings round the edge of the pot as they will root better and faster.
She can get 4-6 cuttings in each pot, the leaves should be level with the pot so they do not rot.
The cuttings she took from the older growth she just neatens us the heal she got when she pulled the cuttings off the stem as this will form the root.
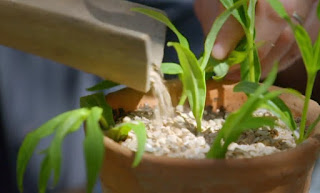
These will be placed in a sheltered spot out of direct sunlight and sprayed regularly with water.

You can also take cuttings from roots and she is going to try and show us how by digging up a chunk of Acanthus to show us what we need to do at it works from plants with thick roots like Oriental Poppies.
The best time to do it is when the plant is dormant in the Autumn or Winter and it is quite easy to do.

The end that went nearest to the crown has to be planted uppermost and Carol manages to get 2 cuttings from her piece of root.

These then have grit added and are watered.
Carol shows us some Anchusa Azurea 'Loddon Royalist' she grew from root cuttings and they are now ready to be planted on outside.
Whether you have grown your own plants from seed, cuttings or division the greatest pleasure comes from planting what you have grown out in the garden.

If you have heavy soil use something to lighten it, it its sandy give it something to add body to it.
The next thing to do is place your plants out and arrange them, even in the smallest area you need your plants to make the most impact possible.

The blue of the Scabiosa and the brilliant yellow of the Achillea go really well together.
The Anchusa she grew from root cuttings will make a nice big clump and they have lots of buds on them and will hopefully flower all summer.


Once your happy with the placing you can tip the plants out and admire the roots before loosening them and dig a hole a bit bigger than the root ball.
Make sure the surrounding soil is nice and loose so the roots can have room to move and grow and the top should be level with the soil.
Carol loves putting her home grown plants together to see how they will look and then gives them lots of love and care and of course water.
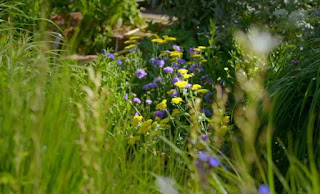
The garden is a continuous process and even the most novice gardener or an experienced gardener by following these simple techniques can create a home grown garden you can enjoy spending time in.
All Photographs are copyright of Channel 5

No comments:
Post a Comment